Ramblings of a sleep-deprived SAHM, papercrafter, and Independent Stampin' Up! ® Demonstrator.
Wednesday 22 December 2010
Relaxing break
Tuesday 21 December 2010
Little gifts
Thursday 16 December 2010
Handmade gift idea
here is a similar one I made as a prototype:
Sunday 5 December 2010
Summer is here!
Still, I know I'll be drawn to my stamp desk (when I can find it!) to work on some new projects now that the new Summer Mini is here!
Click here to see the new Summer Mini online - I am trying to mail out hard copies but life is getting in the way. I'll do my best! Send me an email if you would like one in your hot little hand!
Speaking of the new Mini - the Launch was fantastic! I'll post some pictures of the gorgeous projects we made as soon as I dig them out of my camera, promise!
There is also another promotion running this month - December Frenzy! You can get up to 50% off some great Stampin' Up! products from the 1st to the 29th December. Don't delay - there could be some great gift ideas in that promotion. Just sayin'.
Heat Embossing Tutorial - now with pictures!
Heat Embossing Tutorial
You will need:
Embossing Buddy (103083 $9.50)
Powder Pal or scrap cardstock (Powder Pal 102197 $37.95)
Versamark (102283 $13.95)
Embossing powder (Silver 109131 $8.95)
Heat Tool (106586 $49.95)
Small Paint Brush
Stamps and Paper, naturally!
Step one:
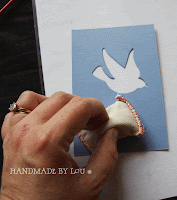
Swipe your cardstock with the Embossing Buddy - this will minimise, if not eliminate stray embossing powder going where you don't want it to. Your fingers leave small traces of oil etc on the cardstock, which attracts the embossing powder. So believe me, it DOES make a difference.
 |
| The Embossing Buddy IS your friend! |
Step two:
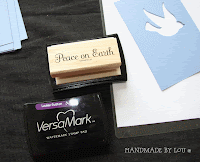
Ink up your stamp in Versamark and stamp your image. Versamark is a clear "sticky" ink which can be used alone to create a gorgeous watermark effect, or for heat embossing as we are about to see, due to its slow drying nature. Normal Classic dye ink is totally unsuitable here as it will dry almost instantly.
 |
 |
| See the watermark impression? |
Sprinkle embossing powder of your choice over the Versamark. Now you see why you need the scrap cardstock or Powder Pal - you tap the excess powder back into the container (this can be messy). Use the paintbrush for any stray bits of powder that are stuck in the wrong spot.
 |
| I tend to keep all my most used embossing poders and glitters into these handy Glad containers, as they are easier on the clean up than the little pots they come in. |
Keep the heat gun on the powder until you see it change - looks magical! Don't overheat it, or the image will look flat instead of raised. You can also scorch the paper if you hold it too close or for too long. This is something you need to practice, as your heat gun might be slightly hotter than mine, for example.
 |
| Again, Glad to the rescure! I find a tray helps me not burn my fingers and reflects the heat, speeding up the process. |
Monday 29 November 2010
Heat Embossing Tutorial
You will need:
Embossing Buddy
Powder Pal or scrap cardstock
Versamark
Embossing powder
Heat Gun
Small Paint Brush
Stamps and Paper, naturally!
Step one:
Swipe your cardstock with the Embossing Buddy - this will minimise, if not eliminate stray embossing powder going where you don't want it to. Your fingers leave small traces of oil etc on the cardstock, which attracts the embossing powder. So believe me, it DOES make a difference.
Step two:
Ink up your stamp in Versamark and stamp your image. Versamark is a clear "sticky" ink which can be used alone to create a gorgeous watermark effect, or for heat embossing as we are about to see, due to its slow drying nature. Normal Classic dye ink is totally unsuitable here as it will dry almost instantly.
Step three:
Sprinkle embossing powder of your choice over the Versamark. Now you see why you need the scrap cardstock or Powder Pal - you tap the excess powder back into the container (this can be messy). Use the paintbrush for any stray bits of powder that are stuck in the wrong spot.
Step four:
Melt the powder with a heat gun. Yes, you CAN use a toaster; but I don't recommend it as people have burned down their kitchens that way! Do NOT try to use a hairdrier instead - it isn't hot enough and will just blow the powder off. I've also heard of people trying to use an industrial heat gun - it is too hot and will scorch the paper. Use a craft heat gun, people, please. This is not the type of thing you want to mess with.
Keep the heat gun on the powder until you see it change - looks magical! Don't overheat it, or the image will look flat instead of raised. You can also scorch the paper if you hold it too close or for too long. This is something you need to practice, as your heat gun might be slightly hotter than mine, for example.
Step five:
Once you have melted the powder - admire your work. Impressive, no?
Stampin' up! sells all of the products listed above. Just in case you wondered.
*my computer is too slow to load my pictures as someone (looking at my husband with intense glare) has exceeded our monthly downloads. I'll have to edit and post the pictures on the 1st December. Sigh.
Tuesday 16 November 2010
More Christmas Cards
 |
| Stamps: Delightfully Decorative Ink: Sahara Sand, Tempting Turquoise Paper: Sahara Sand, Tempting Turquoise, Brushed Gold, Whisper White Other: Ornament Punch, Dimensionals, Linen thread |
Monday 15 November 2010
Summer Mini Launch!
Virginia Golf Club, Elliott St, Banyo.
Here is the flyer with added details:
I hope you can make it!
Sunday 7 November 2010
Crazy week - you know what it's like?
Tomorrow I will be child-free so intend to upload and edit, so you will have to be a little patient with me please!
I have to share a funny with you - I was in a flap on Saturday morning, trying to mass-produce some Christmas cards to sell at the market which I was doing at the last minute. My darling husband tried to help by suggesting that I just stamp Santa hats on some birthday cards I already had. Made me laugh, bless his heart! He just doesn't get it!
Sunday 31 October 2010
Quickest, no-fuss party bags on the planet.
My oldest son turned 8 during the week and he had three mates over yesterday for a low-key party. About half an hour before the boys were to arrive I realised that I hadn't made anything special for party bags! Not to worry, with my trusty Big Shot, a stamp, a punch and some medium cello bags from Stampin' Up! and I had these whipped up in about five minutes!
The blue bag topper was made by folding a Top Note longways, and was stapled to the cello bag once treats were inside. The thank you on old olive card stock was stamped with a stamp from a set which was sold with the curly label punch last year (I think it is retired). It was punched out with the curly label punch, and stuck on with dimensionals. For the final touch, I die cut the first letter of each boy's name in real red cardstock and stuck it on the label with 2-way glue.
I literally used scraps to make these. Bless the Big Shot!
Obviously, eight year old boys don't care about how fancy the treat bag is, or I'd have decorated further. They seemed pretty pleased with them!
Tuesday 26 October 2010
Week 3 Christmas Card
Next Christmas Card Stamp-A-Stack is next week. Stay tuned!
Thursday 21 October 2010
Deceptively Simple
This card proved to be more involved than it looks at first glance:
Next, we sponged the edges with Crumb cake ink. Then came the swirl from Baroque Motifs (a classic stamp set, so versatile) in Old Olive ink. The next step was a little involved - the ghosting technique done with the SAMJ to ensure the image was slightly offset, stamped with Platinum shimmer paint applied directly to the rubber with a dauber. Then came the Rich Razzleberry flowers, the Rich Razzleberry ribbon and tag, attached with linen thread. Oh, and see the white part on the tag? Shimmer White cardstock (YAY!). It is lovely in real life. For a final touch, we added bling in the form of diamontes.
I hadn't realised when I made my sample, that the shimmer paint was VERY messy to work with when you make this card in bulk. Oops, sorry girls!
For a one layer card, this has a lot of texture and interest, built up with the layers of collage and the "ghosting" effect. It is also a perfect example of how you can make non-Christmas stamps and non-traditional colours (step away from Green and Red sometimes!) really work for you in a Christmas Card.
I'll show you the second card we did, a little later.
Sunday 17 October 2010
Dressing Up Christmas Promotion!
The promotion runs from 16th October to 30th November. You can earn FREE ribbon two ways: either you purchase one of four bundles (details below), or you host a workshop worth $550.
Here are the details:
Wednesday 13 October 2010
Twelve weeks of Christmas - card 2
The colour in this photo looks a little strange, sorry about that! The ribbon is a retired Riding Hood Red/Very Vanilla that was in a Mini last Christmas, I think, that I was trying to use up. There is, fortunately, more lovely ribbon like it in the current catalogue!
There is supposed to be a class this week according to my calendar on the right - but I'm just going to focus on the fortnightly Christmas Stamp-A-Stack this month!
Next Stamp-A-Stack is on next week - 21st I think. I'm thinking of running a night time one next Friday night too, if anyone is interested?
Thursday 7 October 2010
The Twelve Weeks of Christmas
So today some lovely ladies and I started making Christmas cards, so that at least that part is under control.
Here is the first card:
Back with the edit! I found my inspiration by swheet (her blog is called Inkwood Designs) but I changed the colours, ribbon and glitter.
Saturday 2 October 2010
petite cargo
It is on today (last day!), Saturday 2nd October from 9:00am to 3:00pm at Auchenflower, Brisbane.
Please contact Anna on ph: 0400 210 079 for the address (I didn't feel comfortable putting it on the www as it is a private residence), or send me an email and I'll give you the heads up!
Happy Anniversary honey!
Tuesday 28 September 2010
Regionals - the Final Chapter
Here is the final project we did - so cute! Love the look of the layers with the two boxes.
Monday 27 September 2010
Regionals Part 3, Revenge of the Stamper!!
Anyhoo, back to the pretty pictures!
This is a sweet 3x3inch gift card (love note). It was easier to cut out that daisy than you might think, thanks to the most excellent Paper Snips from Stampin' Up! They are very sharp, right to the tip, which makes them ideal for fiddly jobs like this. The white gel pen added highlights. Sorry about the untidyness of the sentiment inside the circle - I neglected to clean my stamp properly. D'oh!
Sunday 26 September 2010
Regionals Part 2
Here is the second M&T from Regionals, I hope you like it.
Love these colours together!
Saturday 25 September 2010
Brisbane Regionals
Monday 20 September 2010
Final September Class Project
Sunday 19 September 2010
3rd September class project
Saturday 18 September 2010
My swaps for Brisbane Regionals
Regionals is a one-day traning/social event run by Stampin' up! for Demonstrators and guests, there is always swapping to be done with other Demonstrators, some Make & Takes, and fabulous presentations and informative speakers. It was a lot of fun! If you want to come with me next year, why not join my team?
I still have photos to show you of the other two September Class projects, and more from Regionals, so I'll hopefully be back with more fun stuff to show you tomorrow. Did I just jinx myself then? LOL
Friday 17 September 2010
September Class Card 2
This card uses the following NEW products:
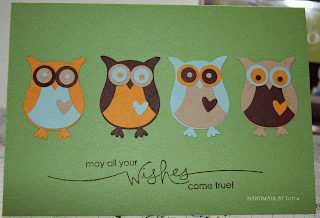
Owl punch, stamp set Curly Cute, card stock colours Cherry Cobbler, Early Espresso and Early Espresso ink.
Thursday 16 September 2010
September Class project #1
What do you think?
Three more projects to show you over the next 3 days!
Wednesday 15 September 2010
A quick note
I'll come back with some more stuff to show you later, I have to get the kids off to school now!
Friday 10 September 2010
More and More Mojo!
I am having a lot of fun coming up with ideas for classes, too, so watch this space!
Hope you like them!
 |
Stamps: Elements of Style , Occasional Quotes (Hostess); Paper: Confetti White, Chocolate Chip, Baja Breeze Ink: Chocolate Chip, Baja Breeze Other: Basic Pearls, Early Esspresso ribbon |
 |
Stamps: Curly Cute Paper: Bashful Blue, Wild Wasabi, Rose Red, Whisper White Ink: Rose Red Other: Elegant Lines Embossing Folder, Big Shot, Scallop Trim Border Punch, Basic Rhinestones |
 |
| Stamps: Heard From the Heart, Paper: Wild Wasabi, More Mustard, Chocolate Chip, baja Breeze, Crumb Cake Ink: Easrly Esspresso (marker) Other: Two Step owl Extra Large Punch |
Thursday 9 September 2010
More New Stuff
 |
| Friends Never Fade, Teeny Tiny Sentiments, Riding Hood Red, Whisper White, Basic Black, Hodgepodge |
 |
| Basic Black, Riding Hood Red, Very Vanilla, Fancy Flower Extra Large punch, Wide Oval Punch, Large Oval Punch, Ocal All, Eyelet Border Punch, Very Vanilla Tafteta, Adhesive half pearls, Newsprint DSP |
Tuesday 7 September 2010
What you missed...
 |
| This was designed by the lovely Rebecca O'Gorman, and it uses the NEW Flower punch, and a new stamp, called For You. |
 |
| This one was designed by me, and it uses the new Party This Way set. |
 |
| Bec's work again, with the new baby Bundle set and Jumbo Wheel, Baby Tees. It was a little tricky - it is a suspension card, but heaps of fun. |
 |
| Mine again, this time using Artistic Etchings in a collage. I love the Vintage look this stamp set gives! |
 |
| If it is pink, it must be Linda's! This card used the divine Vintage Wallpaper embossing folder, and the Friends Never Fade stamp set. |
Apologies for the photos - left it too late in the day to take them in good light - but as you can see, there was something for everyone!
We had a fun day, at the scenic Virginia Golf Club, with door prizes, a raffle and a mega-huge sale of our retired stamps and accessories. We are planning to have another big day in a few months to tie in with the Summer Mini (which will be here in December I think?), so I'll keep you posted about that.
In the meantime, I have scheduled a class this Thursday - but that will depend on whether my order of new products arrives tomorrow! If not, we'll move it back a week. The poor Warehouse people who pack our orders are working overtime trying to keep up with the rush of orders since the new Catty started, so it is taking a little longer than usual for my packages to arrive.
Getting closer....
It's nearly that time of year, where the retirement list comes out. That means the in-colours we've loved the past 2 years are leav...
-
Welcome to the ESAD-SU Sale a Bration Blog Hop! This is my first Blog Hop, I'm very excited. You should have arrived from Linda's ...
-
The last (and first!) time I entered this challenge was #37.....oops, time flies! The colours to use are: Baja Breeze, So Saffron, More Must...
-
Long time lurker, first time poster for Kristina's Colour Challenge. The colours this week were Old Olive, Baja Breeze, Chocolate Chi...


